
@toggledbits I plan to add a second relay or replace it with a dual relay board, so will see how that works out with these Unit numbers.
cw-kid
@cw-kid
Love openLuup - it just keeps working perfectly.
I started looking at trying to add a gen4 Shelly device to the Shelly plugin via L_ShellyBridge.lua. The plugin is a little uncooked (no rudeness intended), so a bit of a rabbit hole for me.
All of a sudden no console pages available in either Firefox or Chrome. AltUI works perfectly and all the log files indicate no errors. openLuup still running everything works as it should - just no console pages.
I possibly screwed something up but any recently changes files show no problems. The original/ backup of L_ShellyBridge.lua was reinstated but still no console.
Bit stumped on this one. Not sure how to debug. Any ideas?
Build 21228 has been released. Docker images available from DockerHub as usual, and bare-metal packages here.
Home Assistant up to version 2021.8.6 supported; the online version of the manual will now state the current supported versions;
Fix an error in OWMWeatherController that could cause it to stop updating;
Unify the approach to entity filtering on all hub interface classes (controllers); this works for device entities only; it may be extended to other entities later;
Improve error detail in messages for EzloController during auth phase;
Add isRuleSet() and isRuleEnabled() functions to expressions extensions;
Implement set action for lock and passage capabilities (makes them more easily scriptable in some cases);
Fix a place in the UI where 24-hour time was not being displayed.
Hey @toggledbits
One thing that bothers me while doing work on new systems/new features, is that I cannot copy&paste actions, and I cannot drag&drop between set and resets.
#1 is for when I want to copy an action between different rules opened in two separate browser windows, while #2 is when I just need to flip a bunch of actions in the reset, or move some logic back and forth.
Both will be appreciated, but I understand the technical challenges. Thanks!
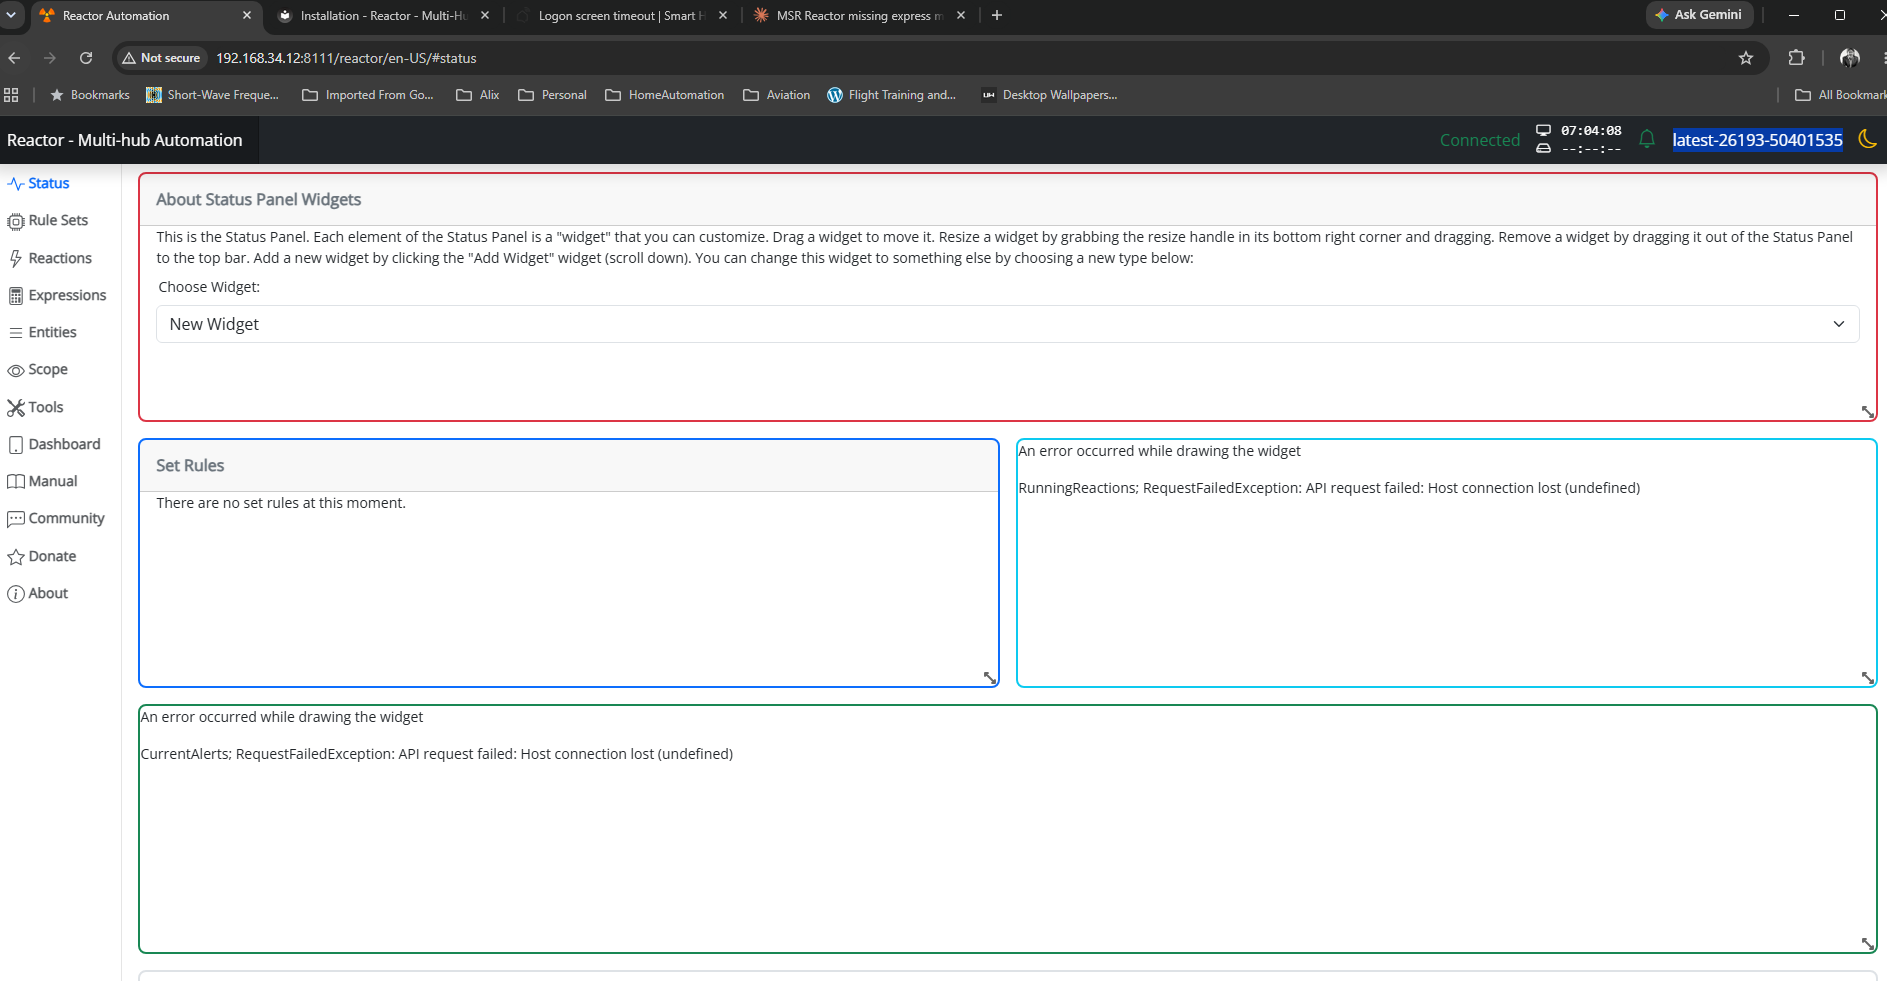
I'm currently on version 26011. I understand that the aarch64 image is no longer supported. So, I therefore need to update to the ARM64 image. Can anyone possibly suggest how I update my docker compose.yaml file (see below). Ideally I'd like to keep my existing reactions etc. rather than start from scratch.
# Multi-System Reactor template docker-compose.yml (version 22160)
#
# Change the lines indicated by "DO"...
#
services:
reactor:
container_name: reactor
environment:
# DO change the TZ: line to set your local time zone.
# See valid TZ list: https://en.wikipedia.org/wiki/List_of_tz_database_time_zones
TZ: GB
#
# DO NOT change this path. Your directory location is in "source" below.
REACTOR_DATA_PREFIX: /var/reactor
# DO change the image below to the one you are using (e.g. armv7l or aarch64 for RPi 4)
image: toggledbits/reactor:latest-aarch64
restart: "always"
expose:
- 8111
ports:
- 8111:8111
volumes:
# DO change the /home/username/reactor below to the directory you created for
# your local data; DO NOT change the /var/reactor part
- /home/pi/docker/reactor:/var/reactor
- /etc/localtime:/etc/localtime:ro
tmpfs: /tmp
It appears that Ezlo is going to new levels of paid subscription for cloud services supporting Vera hubs. I have to congratulate them. It will soon be 8 years since Ezlo acquired Vera, and despite their purported financial and "intellectual" capital, they have to date not produced a viable full replacement for Vera. Now they are going to charge extra for services for a platform that they stopped updating years ago.
If you know anyone who hasn't yet fully moved on from Captain Ahab's White Whale Chase, please remind them that my Decouple project is still up on Github to decouple a Vera Plus/Secure/Edge from Vera/Ezlo's cloud services. Veras have been said to misbehave when they can't reach the mother ship.
I have also written my first new Vera plugin in... six years? more?... the AlertPushover project will send Vera hub alerts to Pushover, so you can still get messages generated by your Vera hub without paying for Ezlo's cloud service. It's crude but functional (i.e. better than nothing/worth every penny paid).
These two projects won't replace the functionality of their cloud service and app for those who need those things. But any that don't, this may help bridge the gap. Hopefully these stragglers who have waited so long and been disappointed so often will get the idea that it's time to move on.
If you are using the armv7l docker image, the OpenJS Foundation that publishes node is no longer producing 32-bit builds as of v24. That means the last supported LTS version of node for armv7l is v22, which will go End-of-Life in May 2027.
Therefore, the Reactor armv7l image is now deprecated and will only be produced until node v22 goes EOL, and I will not publish armv7l images beyond that date.
If you are running an RPi 3 or earlier with Reactor, you are on this image, and will need to upgrade hardware to a 64-bit model and use the arm64 image. If you need help getting it done, ask in this category.
@toggledbits I pulled the image (well, Watchtower did) and within minutes the whole system went offline.
The log looks like it ends with 26143.
[latest-26143]2026-05-31T15:23:44.547Z <default:INFO> Closing container Container#Predicate#rule-mkahsmgf/26qq82mw-cons
[latest-26143]2026-05-31T15:23:44.547Z <default:INFO> Closing container Container#Predicate#rule-lqyfljfi/22f8on0t-cons
[latest-26143]2026-05-31T15:23:44.547Z <default:INFO> Closing container Container#Predicate#rule-lsb61rw8/24oenqi2-cons
[latest-26143]2026-05-31T15:23:44.547Z <default:INFO> Closing container Container#Predicate#rule-lrh58he0/rule-lrh58he0:S-1c00gfib-cons
[latest-26143]2026-05-31T15:23:44.547Z <default:INFO> Closing container Container#Predicate#rule-lrh58he0/1c00dylr-cons
[latest-26143]2026-05-31T15:23:44.547Z <default:INFO> Closing container Container#Predicate#rule-lrh58he0/1nam9w5u-cons
[latest-26143]2026-05-31T15:23:44.547Z <default:INFO> Closing container Container#Predicate#rule-miuh2qqi/22ls4lql-cons
[latest-26143]2026-05-31T15:23:44.547Z <default:INFO> Closing container Container#Predicate#rule-kwc6rmci/rule-kwc6rmci:S-1vj8sdfc-cons
[latest-26143]2026-05-31T15:23:44.547Z <default:INFO> Closing container Container#Predicate#rule-kwc6rmci/rule-kwc6rmci:S-1qanz01x-cons
[latest-26143]2026-05-31T15:23:44.547Z <default:INFO> Closing container Container#Predicate#rule-ladyja6a/24lq19p6-cons
[latest-26143]2026-05-31T15:23:44.547Z <default:INFO> Closing container Container#Predicate#rule-mk0o8iox/23oy468y-cons
[latest-26143]2026-05-31T15:23:44.547Z <default:INFO> Closing container Container#Predicate#rule-miscg2h3/rule-miscg2h3:S-22gmbq1c-cons
[latest-26143]2026-05-31T15:23:44.547Z <default:INFO> Closing container Container#Predicate#re-kxgrfjke/238p0old-cons
[latest-26143]2026-05-31T15:23:44.547Z <default:INFO> Closing container Container#Predicate#re-m7ccsso5/re-m7ccsso5-1r0myjxa-cons
[latest-26143]2026-05-31T15:23:44.547Z <default:INFO> Closing container Container#Predicate#rule-ladyja6a/19nl9wq2-cons
[latest-26143]2026-05-31T15:23:44.547Z <default:INFO> Closing container Container#Predicate#rule-ladyja6a/rule-ladyja6a:S-yl3xk9t-cons
[latest-26143]2026-05-31T15:23:44.547Z <default:INFO> Closing container Container#Predicate#rule-ladyja6a/rule-ladyja6a:S-yl3vv5m-cons
[latest-26143]2026-05-31T15:23:44.547Z <default:INFO> Closing container Container#Predicate#re-ln7j2nqp/re-ln7j2nqp-22mx9lzd-cons
[latest-26143]2026-05-31T15:23:44.547Z <default:INFO> Closing container Container#Predicate#re-ln7j2nqp/22mx87c8-cons
[latest-26143]2026-05-31T15:23:44.547Z <default:INFO> Closing container Container#Predicate#rule-licneppy/1mzwe7ht-cons
[latest-26143]2026-05-31T15:23:44.547Z <default:INFO> Closing container Container#Predicate#rule-ml3194ih/25jqt1j4-cons
[latest-26143]2026-05-31T15:23:44.547Z <default:INFO> Closing container Container#Predicate#re-kxgrg7kf/227hshak-cons
[latest-26143]2026-05-31T15:23:44.547Z <default:INFO> Closing container Container#Predicate#rule-reactorexmachina/13ua1p95-cons
[latest-26143]2026-05-31T15:23:44.547Z <default:INFO> Closing container Container#Predicate#rule-reactorexmachina/13uagam7-cons
[latest-26143]2026-05-31T15:23:44.547Z <default:INFO> Closing container Container#Predicate#rule-grpvl9oypg/rule-grpvl9oypg:R-134x4cbv-cons
[latest-26143]2026-05-31T15:23:44.547Z <default:INFO> Closing container Container#Predicate#rule-grpvl9oypg/rule-grpvl9oypg:R-134x2fyl-cons
[latest-26143]2026-05-31T15:23:44.547Z <default:INFO> Closing container Container#Predicate#re-lscjrws1/238p5c22-cons
[latest-26143]2026-05-31T15:23:44.547Z <default:INFO> Closing container Container#Predicate#rule-lbwr0jvq/1xkczf03-cons
[latest-26143]2026-05-31T15:23:44.547Z <Structure:NOTICE> Structure Structure#1 stopped
[latest-26143]2026-05-31T15:23:44.547Z <app:NOTICE> Closing APIs...
[latest-26143]2026-05-31T15:23:44.547Z <wsapi:NOTICE> wsapi: closing...
[latest-26143]2026-05-31T15:23:44.547Z <wsapi:NOTICE> wsapi: disconnecting from "192.168.1.23#82" (1001 service closing)
[latest-26143]2026-05-31T15:23:44.548Z <httpapi:NOTICE> HTTP API closing...
[latest-26143]2026-05-31T15:23:44.549Z <wsapi:NOTICE> wsapi: server closed
[latest-26143]2026-05-31T15:23:44.549Z <httpapi:INFO> HTTP server closed.
[latest-26143]2026-05-31T15:23:44.549Z <app:NOTICE> Stopping timers...
[latest-26143]2026-05-31T15:23:44.551Z <app:null> Shutdown complete, process ID 1
[latest-26143]2026-05-31T15:23:44.551Z <app:null> Closing logs...
[latest-26143]2026-05-31T15:23:44.551Z <default:null> Closing log
I can SSH to the VM. Alas, I do not have the previous image for 26143 as I'm a little too quick sometimes on housekeeping.
Today marks another milestone in my Home Automation journey.
After tripping the main breaker once, and shedding more blood than is normally recommended, the underfloor heating (which was the last Z-wave device on my system) has been replaced with a Zigbee one.
Edited reactor.conf
Disabled z-way-server
Disabled Openluup
Z-wave is no more....
C
Posts
-
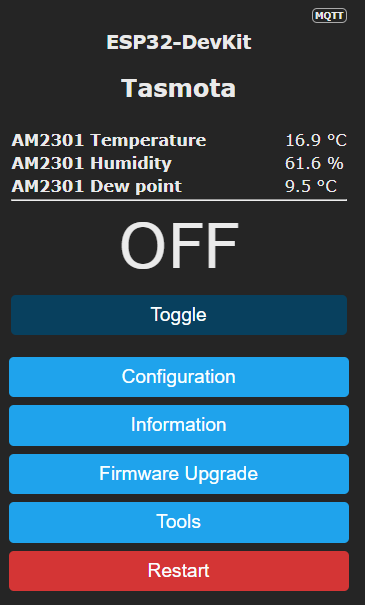
Struggling to setup my first Tasmota device and MQTT -
Struggling to setup my first Tasmota device and MQTTLooking at the HTTP output for everything from the Tasmota, I see these snippets.
"StatusSTS" - seems to contain the state of the relay e.g. "POWER":"ON"
"StatusSTS":{"Time":"2026-02-16T18:58:25","Uptime":"0T03:32:46","UptimeSec":12766,"Heap":106,"SleepMode":"Dynamic","Sleep":50,"LoadAvg":19,"MqttCount":1,"Berry":{"HeapUsed":4,"Objects":50},"POWER":"ON","Wifi":{"AP":1,"SSId":"ASUS_86_2G","BSSId":"04:D9:F5:74:C5:E0","Channel":3,"Mode":"HT40","RSSI":100,"Signal":-19,"LinkCount":1,"Downtime":"0T00:00:04"},"Hostname":"Stairs-Cupboard-Fan-ESP32","IPAddress":"192.168.0.49"}}Where as "StatusSNS" contains the Temp data.
"StatusSNS":{"Time":"2026-02-16T18:58:25","AM2301":{"Temperature":19.8,"Humidity":50.3,"DewPoint":9.1},"TempUnit":"C"},So it seems MSR doesn't know where to find the relay status / state currently? and I am not sure how to fix it.
As a guess I tried adding source "POWER" to the relay section of the yaml but didn't seem to work and bring in the "ON" or "OFF" value.
tasmota_fan_controller_relay:
        name: "Stairs Cupboard Fan"
        include: tasmota_generic_relay
        topic: "fan_controller"
        source: "POWER"
        unit: "1"
I was poking around the file system to find these Tasmota default templates. I see this folder but its empty.
/home/stuart/reactor/config/mqtt_templatesI do see a file called tasmota.yaml however in this folder.
/home/stuart/reactor/ext/MQTTController/templatesEDIT: I just fixed it by changing unit: "1" to unit: "" in the reactor.yaml.
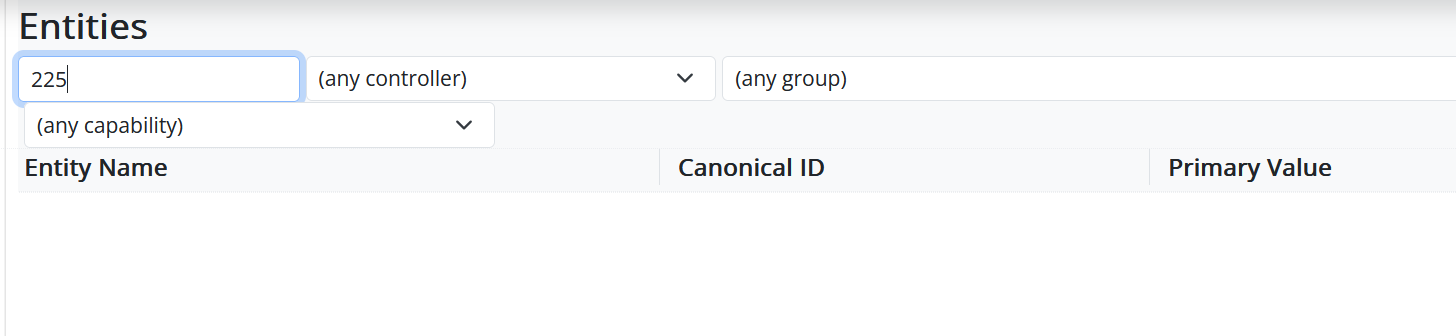
It now say "false" for power state in the Entites area. I thought I had to put a 1 in unit because in Tasmota somewhere, I saw the Relay was number 1. -
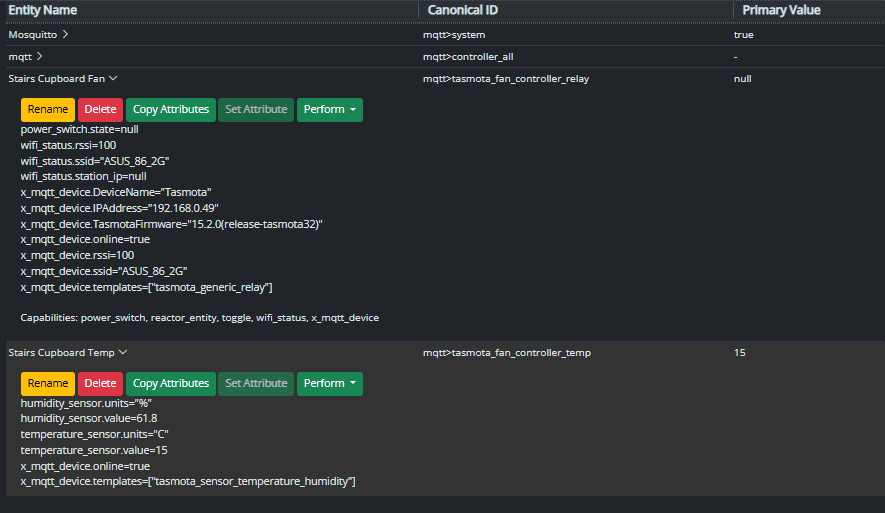
Struggling to setup my first Tasmota device and MQTTActually I do have one issue: power_switch.state=null
It seems MSR is not seeing what the state of the relay currently is? Which is causing me an issue now in a rule I am trying to create.
If I run this command in terminal on the MSR / MQTT broker box
:~mosquitto_sub -v -t 'tele/fan_controller/#' -t 'stat/fan_controller/#'I see this:
tele/fan_controller/LWT Online
tele/fan_controller/STATE {"Time":"2026-02-16T18:38:48","Uptime":"0T03:13:09","UptimeSec":11589,"Heap":113,"SleepMode":"Dynamic","Sleep":50,"LoadAvg":19,"MqttCount":1,"Berry":{"HeapUsed":4,"Objects":50},"POWER":"OFF","Wifi":{"AP":1,"SSId":"ASUS_86_2G","BSSId":"04:D9:F5:74:C5:E0","Channel":3,"Mode":"HT40","RSSI":100,"Signal":-20,"LinkCount":1,"Downtime":"0T00:00:04"},"Hostname":"Stairs-Cupboard-Fan-ESP32","IPAddress":"192.168.0.49"}
tele/fan_controller/SENSOR {"Time":"2026-02-16T18:38:48","AM2301":{"Temperature":21.2,"Humidity":47.9,"DewPoint":9.7},"TempUnit":"C"}
stat/fan_controller/POWER OFF
stat/fan_controller/POWER OFFWhich is correct, the fan is currently off.
So maybe the yaml code is not quite right if its not seeing the state of the relay.
I can turn on / off the relay however via MSR so it is talking to it somewhat.
This is what is in the reactor.yaml file currently.
- id: mqtt name: Mosquitto enabled: true implementation: MQTTController config: entities: tasmota_fan_controller_temp: name: "Stairs Cupboard Temp" include: tasmota_sensor_temperature_humidity topic: "fan_controller" source: AM2301 tasmota_fan_controller_relay: name: "Stairs Cupboard Fan" include: tasmota_generic_relay topic: "fan_controller" unit: "1" -
Struggling to setup my first Tasmota device and MQTTSweet everything appears to be working now, I created some virtual devices in Vera for the Temp and Humidity and some new MSR rules to push those values to them in Vera if they change.
Updated my Home Remote dashboard and I can see them on my phone now and also have a switch to turn the Fan on and off..
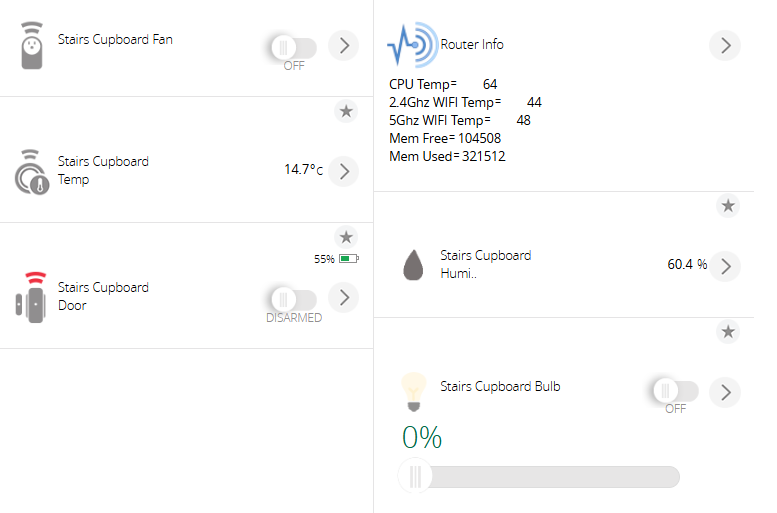
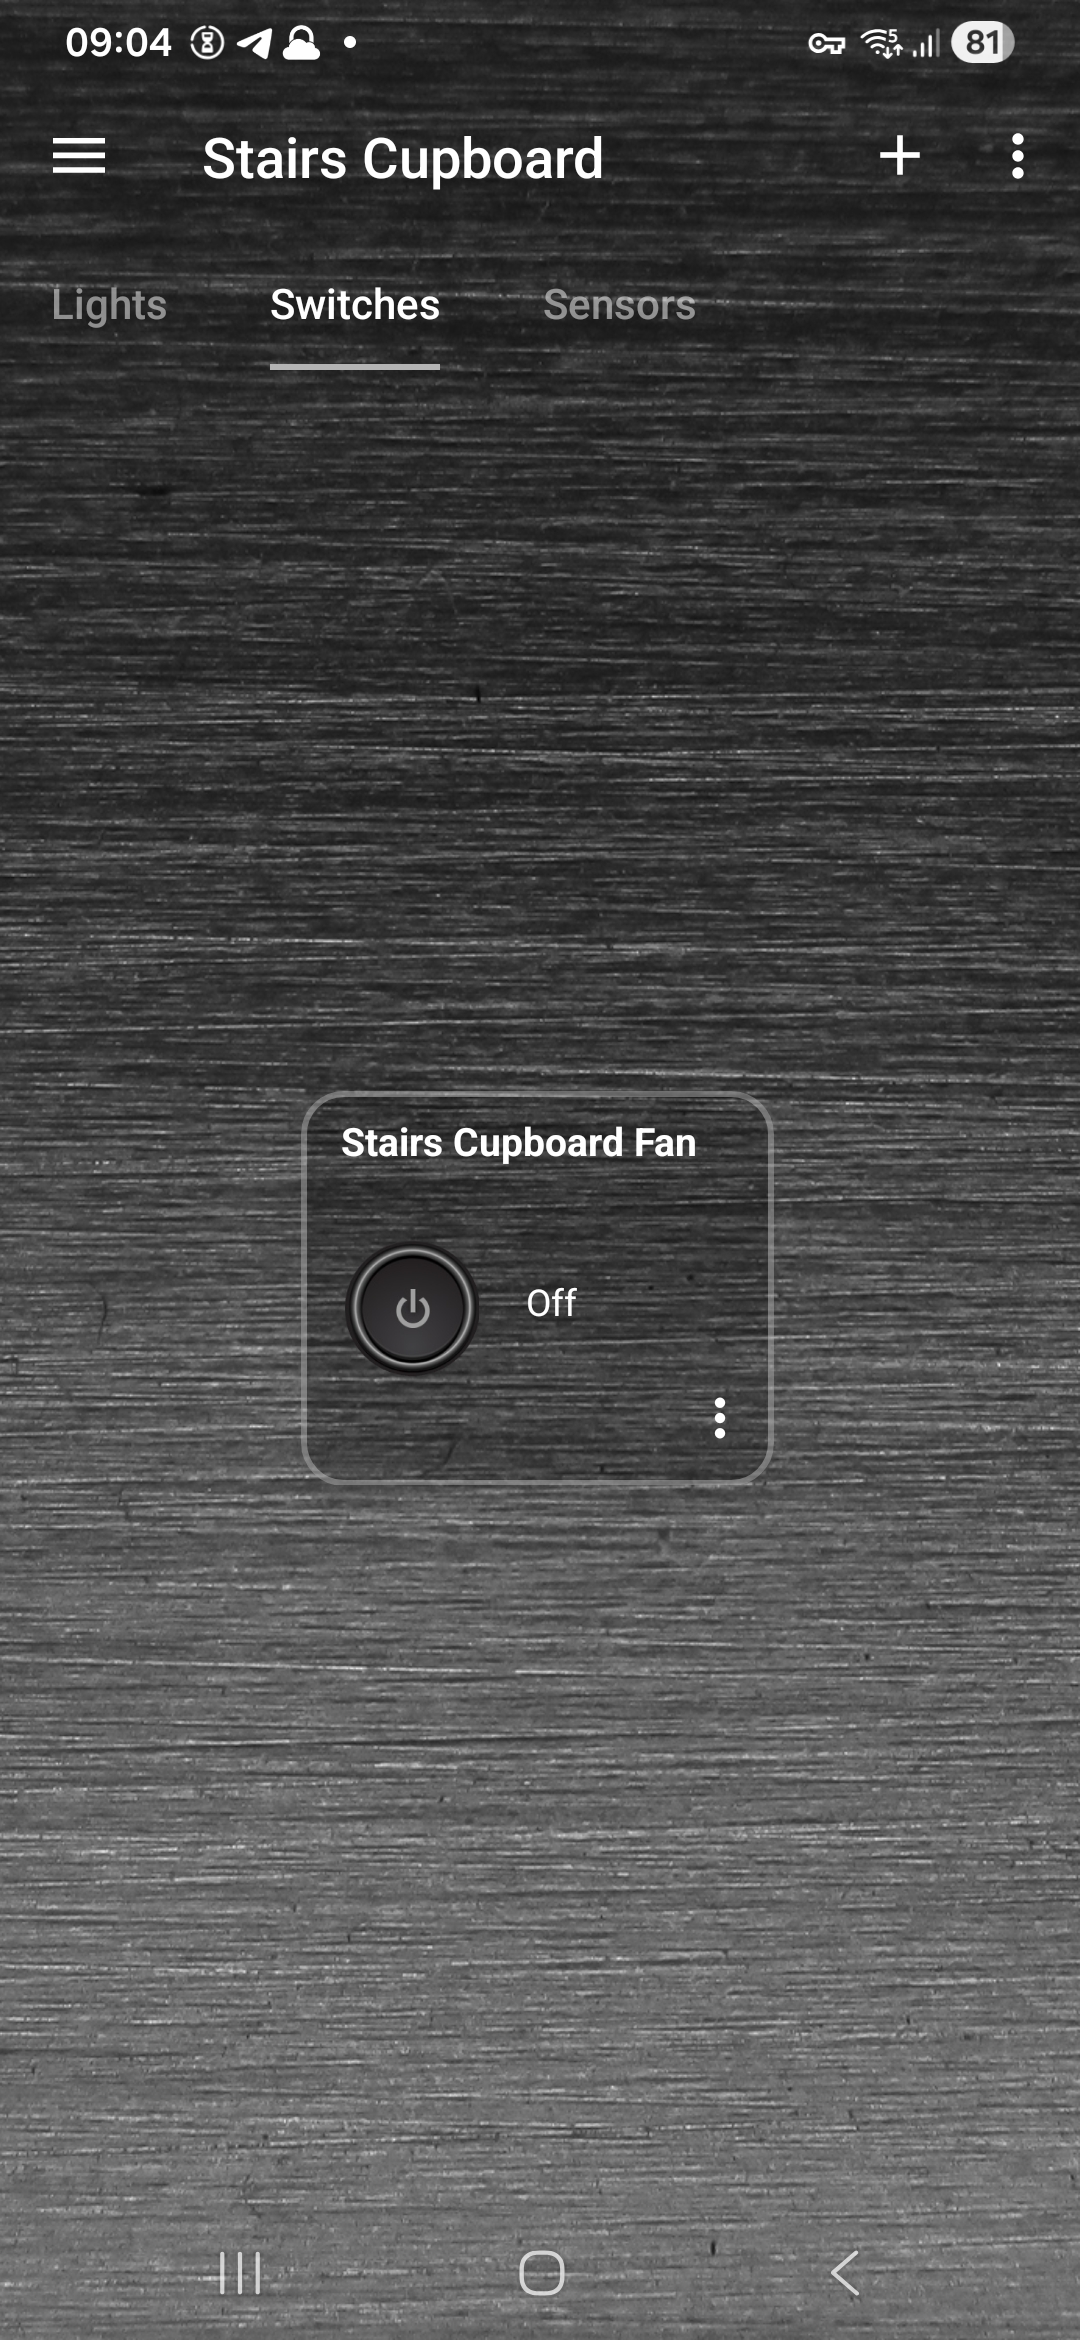 !
!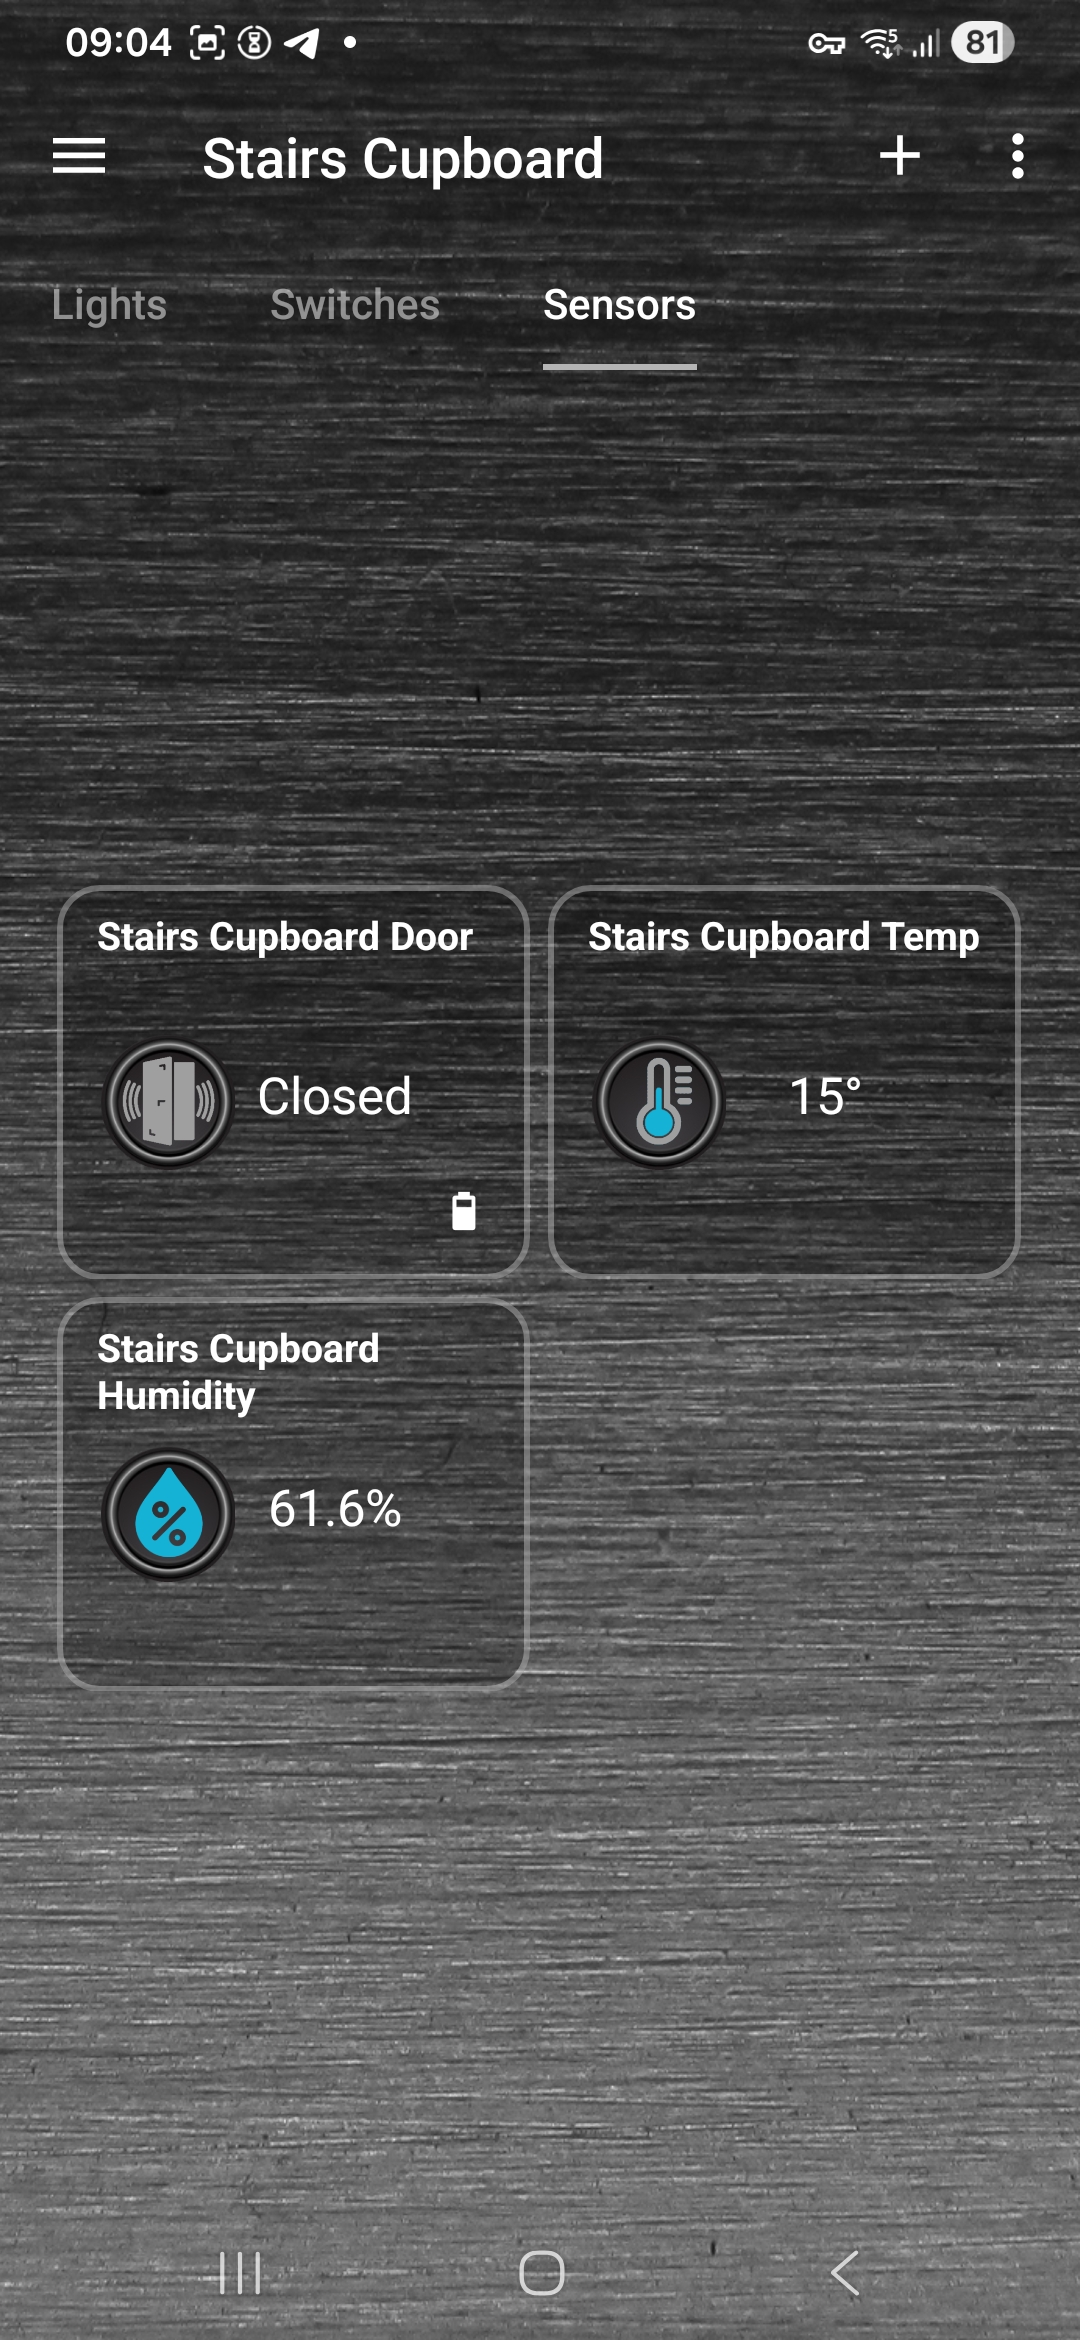 !
! -
Struggling to setup my first Tasmota device and MQTTWhat else can I build! I have loads of spare ESP boards and sensors laying around the place, what I was using when trying out "EzloPi" but I am gonna switch to Tasmota / MSR and eventually Home Assistant when I retire my Vera Plus for Z-Wave duties.
-
Struggling to setup my first Tasmota device and MQTTIts working now, a wire came off the ESP board for the DHT22 which is why it was null. I connected the wire again and now I see data in MSR.
So this seems to be the now working yaml code:
- id: mqtt
  name: Mosquitto
  enabled: true
  implementation: MQTTController
  config:
    entities:
      tasmota_fan_controller_temp:
        name: "Stairs Cupboard Temp"
        include: tasmota_sensor_temperature_humidity
        topic: "fan_controller"
        source: AM2301
      tasmota_fan_controller_relay:
        name: "Stairs Cupboard Fan"
        include: tasmota_generic_relay
        topic: "fan_controller"
        unit: "1"
And I did just install MQTT Explorer so a screen shot of that:
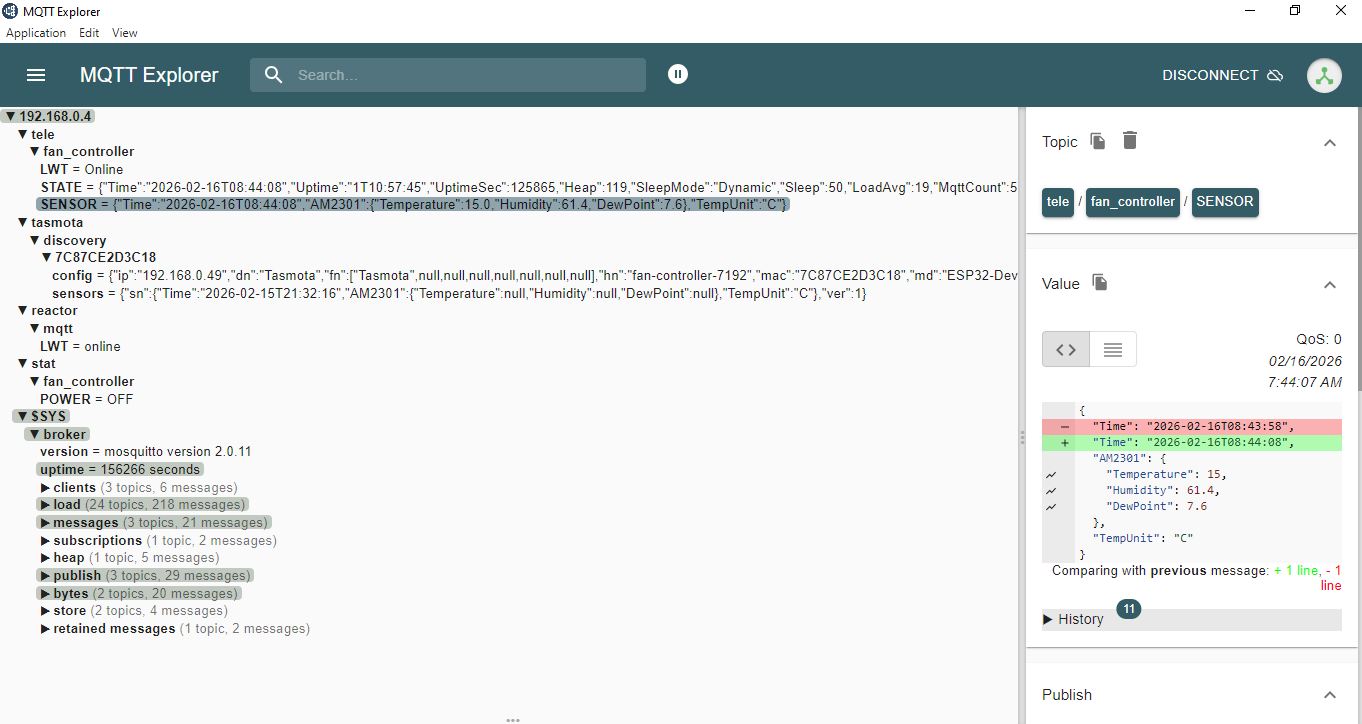
Thanks for everyone help, I just needed a nudge in the right direction with the MSR yaml code.
-
Struggling to setup my first Tasmota device and MQTTClearly the problem is I don't know how to structure or write the required yaml code. Following @therealdb example above, I changed mine to this:
- id: mqtt
  name: Mosquitto
  enabled: true
  implementation: MQTTController
  config:
    entities:
      tasmota_fan_controller_temp:
        name: "Stairs Cupboard Temp"
        include: tasmota_sensor_temperature_humidity
        topic: "fan_controller"
        source: AM2301
I could then finally see an Entity for it in MSR for the Temp sensor. But with no data values as yet its null.
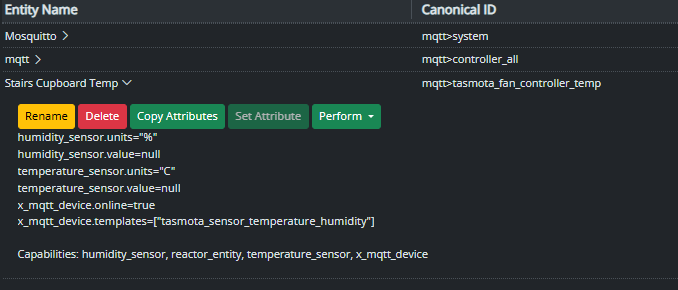
That obviously only imported the DHT22 (AM230) Temp sensor part.
I then tried to add this to also include the 1 channel Relay part.
- id: mqtt
  name: Mosquitto
  enabled: true
  implementation: MQTTController
  config:
    entities:
      tasmota_fan_controller_temp:
        name: "Stairs Cupboard Temp"
        include: tasmota_sensor_temperature_humidity
        topic: "fan_controller"
        source: AM2301
      tasmota_fan_controller_relay:
        name: "Stairs Cupboard Fan"
        include: tasmota_generic_relay
        topic: "fan_controller"
        source:
        unit: "1"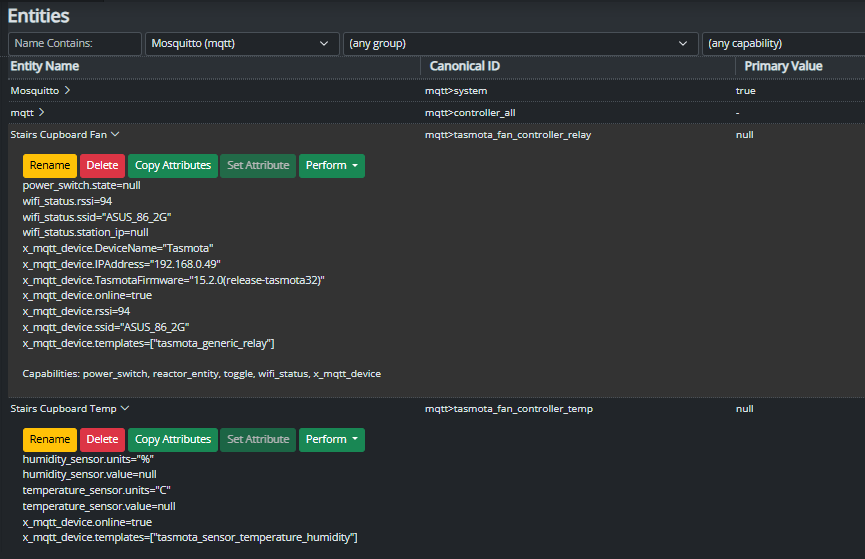
The relay part seems to be working! I pressed the "Perform" button and was able to turn on and off the relay / fan OK.
Seems I didn't need a "Source:" for the relay portion, I left that blank as I didn't know what to put in there anyway.
So just not sure why I have no data from the Temp sensor currently.
-
Struggling to setup my first Tasmota device and MQTTA.I. just been telling me how to control the Tasmota with HTTP commands can turn on / off the relay now via HTTP if need be. This commands shows everything about the Tasmota device.
http://192.168.0.49/cm?cmnd=Status%200{"Status":{"Module":1,"DeviceName":"Tasmota","FriendlyName":["Tasmota"],"Topic":"fan_controller","ButtonTopic":"0","Power":"0","PowerLock":"0","PowerOnState":3,"LedState":1,"LedMask":"FFFF","SaveData":1,"SaveState":1,"SwitchTopic":"0","SwitchMode":[1,0,0,0,0,0,0,0,0,0,0,0,0,0,0,0,0,0,0,0,0,0,0,0,0,0,0,0,0,0,0,0],"ButtonRetain":0,"SwitchRetain":1,"SensorRetain":1,"PowerRetain":1,"InfoRetain":0,"StateRetain":1,"StatusRetain":0},"StatusPRM":{"Baudrate":115200,"SerialConfig":"8N1","GroupTopic":"tasmotas","OtaUrl":"http://ota.tasmota.com/tasmota32/release/tasmota32.bin","RestartReason":"Software reset CPU","Uptime":"0T15:23:32","StartupUTC":"2026-02-14T20:46:23","Sleep":50,"CfgHolder":4617,"BootCount":8,"BCResetTime":"2026-02-14T20:26:13","SaveCount":48},"StatusFWR":{"Version":"15.2.0(release-tasmota32)","BuildDateTime":"2025-12-12T10:58:29","Core":"3.3.4","SDK":"5.3.4.251205","CpuFrequency":160,"Hardware":"ESP32-D0WD-V3 v3.0","CR":"430/699"},"StatusLOG":{"SerialLog":2,"WebLog":2,"MqttLog":0,"FileLog":0,"SysLog":0,"LogHost":"","LogPort":514,"SSId":["ASUS_86_2G",""],"TelePeriod":60,"Resolution":"558180C0","SetOption":["000082AB","2805C80000000600003C5A0A192800000000","00000080","00006000","00004080","00000000"]},"StatusMEM":{"ProgramSize":2086,"Free":793,"Heap":112,"StackLowMark":3,"PsrMax":0,"PsrFree":0,"ProgramFlashSize":4096,"FlashSize":4096,"FlashChipId":"16405E","FlashFrequency":80,"FlashMode":"DIO","Features":["0809","9F9AD7DF","0015A001","B7F7BFCF","05DA9BC4","E0360DC7","480840D2","20200000","D4BC482D","810A80F1","00000814"],"Drivers":"1,2,!3,!4,!5,7,!8,9,10,11,12,!14,!16,!17,!20,!21,!24,26,!27,29,!34,!35,38,50,52,!59,!60,62,!63,!66,!67,!68,!73,!75,82,!86,!87,!88,!91,!121","Sensors":"1,2,3,5,6,7,8,9,10,11,12,13,14,15,17,18,19,20,21,22,26,31,34,37,39,40,42,43,45,51,52,55,56,58,59,64,66,67,74,85,92,95,98,103,105,109,127","I2CDriver":"7,8,9,10,11,12,13,14,15,17,18,20,24,29,31,36,41,42,44,46,48,58,62,65,69,76,77,82,89"},"StatusNET":{"Hostname":"fan-controller-7192","IPAddress":"192.168.0.49","Gateway":"192.168.0.1","Subnetmask":"255.255.255.0","DNSServer1":"192.168.0.1","DNSServer2":"0.0.0.0","Mac":"7C:87:CE:2D:3C:18","IP6Global":"","IP6Local":"fe80::7e87:ceff:fe2d:3c18%st1","Ethernet":{"Hostname":"","IPAddress":"0.0.0.0","Gateway":"0.0.0.0","Subnetmask":"0.0.0.0","DNSServer1":"192.168.0.1","DNSServer2":"0.0.0.0","Mac":"00:00:00:00:00:00","IP6Global":"","IP6Local":""},"Webserver":2,"HTTP_API":1,"WifiConfig":4,"WifiPower":16.0},"StatusMQT":{"MqttHost":"192.168.0.4","MqttPort":1883,"MqttClientMask":"DVES_%06X","MqttClient":"DVES_2D3C18","MqttUser":"DVES_USER","MqttCount":3,"MqttTLS":0,"MAX_PACKET_SIZE":1200,"KEEPALIVE":30,"SOCKET_TIMEOUT":4},"StatusTIM":{"UTC":"2026-02-15T12:09:55Z","Local":"2026-02-15T13:09:55","StartDST":"2026-03-29T02:00:00","EndDST":"2026-10-25T03:00:00","Timezone":"+01:00","Sunrise":"07:58","Sunset":"18:10"},"StatusSNS":{"Time":"2026-02-15T13:09:55","AM2301":{"Temperature":15.0,"Humidity":62.2,"DewPoint":7.8},"TempUnit":"C"},"StatusSTS":{"Time":"2026-02-15T13:09:55","Uptime":"0T15:23:32","UptimeSec":55412,"Heap":112,"SleepMode":"Dynamic","Sleep":50,"LoadAvg":19,"MqttCount":3,"Berry":{"HeapUsed":4,"Objects":50},"POWER":"OFF","Wifi":{"AP":1,"SSId":"ASUS_86_2G","BSSId":"04:D9:F5:74:C5:E0","Channel":10,"Mode":"HT40","RSSI":100,"Signal":-48,"LinkCount":2,"Downtime":"0T00:00:04"},"Hostname":"fan-controller-7192","IPAddress":"192.168.0.49"}} -
Struggling to setup my first Tasmota device and MQTTReading the help page it shows this example config. I don't know what this channel number does? I didn't see a setting for setting a channel number in the Tasmota web UI. However I see there is a "channel" I saw in the data stream in the terminal mine mentioned channel 10. So I tried adding that also into my config.
EDIT: Current Control Channel: 10 appears to be the current 2.4GHZ WIFI channel of my router, its set to AUTO so that channel will change or "channel" in the reactor.yaml something different?
config:
    source: "mqtt://127.0.0.1:1883/"
    entities:
      shelly1_stairway:
        name: "Stairway Light"
        topic: shelly1_43DFD2
        include: shelly_relay
        channel: 0
- id: mqtt enabled: true implementation: MQTTController name: Mosquitto config: source: mqtt://127.0.0.1:1883 log_topics: ['tele','stat','tasmota'] # only for testing, disable when not in use (makes big log file) entities: tasmota_fan_controller: name: "Tasmota Fan Controller" topic: fan_controller # matches topic configured in Tasmota unit: 1 # relay number on the device include: - tasmota_generic_relay - tasmota_sensor_temperature_humidity channel: 10Didn't help however adding Channel still no new entities appearing.
Just seen this also:
"notably Tasmota, do not have MQTT retain on by default (a poor choice for IoT devices, IMO). On Tasmota devices, you can turn it on by using the PowerRetain on, SwitchRetain on, SensorRetain on and StateRetain on commands in the Tasmota console."
I will run those commands now.
-
Struggling to setup my first Tasmota device and MQTT@CatmanV2 said in Struggling to setup my first Tasmota device and MQTT:
MQTT Explorer is good for troubleshooting
Thanks I will check that out.
-
Struggling to setup my first Tasmota device and MQTT@toggledbits said in Struggling to setup my first Tasmota device and MQTT:
include:
- tasmota_generic_relay
- tasmota_sensor_temperature_humidityThanks, now MSR reads the reactor.yaml file as it shows me the Vera controllers etc. But I am seeing this alert now:
"controller "Mosquitto" (undefined mqtt) could not be loaded at startup due to error. See the log."
I looked in the reactor.log and all its rotations but could not see any mention of MQTT.
I also checked the reactor.yaml file on that website and it says its valid.
i then changed this "interface: MQTTController" to this "implementation: MQTTController" and restarted and now I can see the MQTT Controller again under Entities.
I then waited like 10 minutes to see if any new "fan_controller" devices would appear ? And nothing does. Searching the logs again for "mqtt" there are no search matches. Also cannot see a mqtt-topics.log file in the logs folder.
If I run this command on the MSR / MQTT Broker box.
mosquitto_sub -v -t 'tele/fan_controller/#' -t 'stat/fan_controller/#'Eventually some data from the ESP / Tasmota comes in:
tele/fan_controller/LWT Online
tele/fan_controller/STATE {"Time":"2026-02-15T11:59:06","Uptime":"0T14:12:43","UptimeSec":51163,"Heap":120,"SleepMode":"Dynamic","Sleep":50,"LoadAvg":19,"MqttCount":3,"Berry":{"HeapUsed":4,"Objects":50},"POWER":"OFF","Wifi":{"AP":1,"SSId":"ASUS_86_2G","BSSId":"04:D9:F5:74:C5:E0","Channel":10,"Mode":"HT40","RSSI":98,"Signal":-51,"LinkCount":2,"Downtime":"0T00:00:04"},"Hostname":"fan-controller-7192","IPAddress":"192.168.0.49"}
tele/fan_controller/SENSOR {"Time":"2026-02-15T11:59:06","AM2301":{"Temperature":15.6,"Humidity":62.1,"DewPoint":8.4},"TempUnit":"C"}
I see data for the temp sensor and I assume "POWER":"OFF" is the Relay / Switch state, as it is currently off.
-
Struggling to setup my first Tasmota device and MQTTThe formatting in the reator.yaml file looks OK ? I am using notepad ++
But anytime I try to add the new MQTT Controller section and restart MSR it doesn't load the config. if I remove that new section. save and restart MSR then it does load the config as I see my other Vera controllers then in Entities.
-
Struggling to setup my first Tasmota device and MQTT -
Struggling to setup my first Tasmota device and MQTTKnew A.I. just dreams some things up out of thin air! I have removed the stuff it suggested to add to the reactor.yaml file.
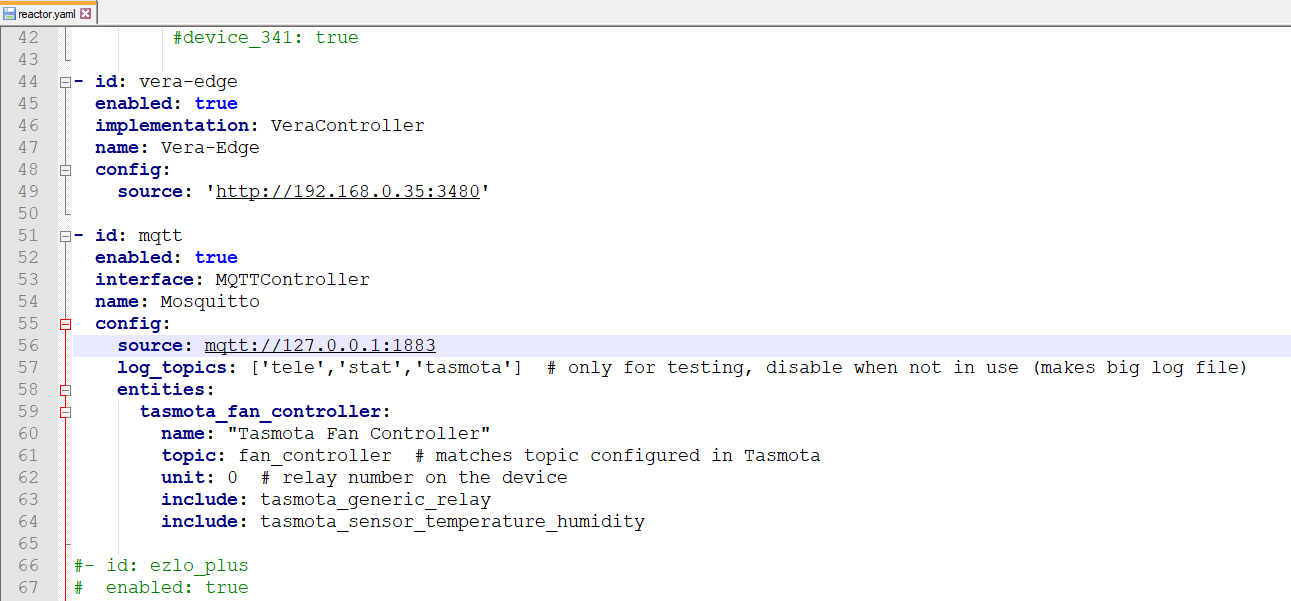
I have this now as my MQTT Controller section:
- id: mqtt
  enabled: true
  interface: MQTTController
  name: Mosquitto
  config:
    source: 'mqtt://127.0.0.1:1883'
    log_topics: ['tele','stat','tasmota']  # only for testing, disable when not in use (makes big log file)
    entities:
      tasmota_fan_controller:
        name: "Tasmota Fan Controller"
        topic: fan_controller  # matches topic configured in Tasmota
        unit: 0  # relay number on the device
        include: tasmota_generic_relay
        include: tasmota_sensor_temperature_humidity
However MSR is not loading it now, it says "The Reactor configuration in "/home/stuart/reactor/config/reactor.yaml" could not be read; the system has started with an empty configuration." I guess there is something wrong with the formatting somewhere. Seems very picky if it loads the config file or not after I have edited it etc.
I have used "interface: MQTTController" and not "implementation: MQTTController" correct ?
@toggledbits said in Struggling to setup my first Tasmota device and MQTT:
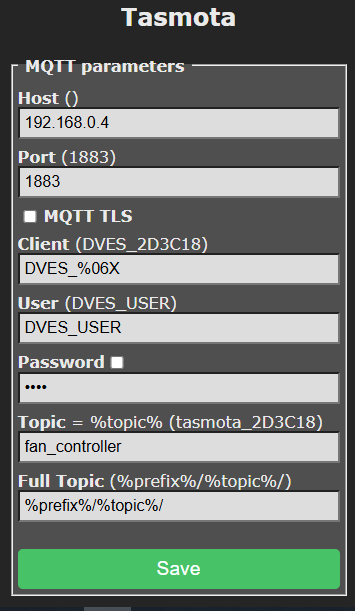
Please show more of the Tasmota device configuration (screen shots), so we can help you with that.
Some more details:
Hardware:
ESP32-WROOM-32
Chip Information -
XX5R69
Silabs CP2102
DCL00X
2108+Computer Fan is 12V with external DC power supply
Relay (SRD-05VDC-SL-C) (Single Channel)
TTP223B Touch Sensor
DHT22 Temperature Humidity SensorI used one of these expansion boards what the ESP32 board sits into, as it gives you more pins to connect multiple sensor etc. Like it gives you more pins for the 3.3V and 5V for example.
Pinout:
TTP223B Touch Sensor (Signal Wire) -> GPIO_IN:4 (Input)
Relay (SRD-05VDC-SL-C) (Signal Wire) -> GPIO_OUT:27 (Output)
DHT22 Temperature Humidity Sensor (Signal Wire) -> GPIO:5There is an "Information" button in the Tasmota device webpage that also shows a lot of device info if you want that also?
Thanks.
-
Struggling to setup my first Tasmota device and MQTTHi
Trying to create my first Tasmota device on an ESP board. I flashed it OK setup the GPIO pins and pointed it to an new MQTT broker running on the same Linux Debian box as MSR. I followed these instructions here to install a MQTT Controller in MSR, which I can now see under Entities. My topic on the Tasmota setup I called "fan_controller" I don't see any new device coming into MSR however.
My ESP has an DHT22 Temp sensor attached and a Single Channel Relay to control a Fan and I also have a local touch button connected to the ESP board.
If I run this command in terminal on the Debian box I do see some data from the ESP / Tasmota device.
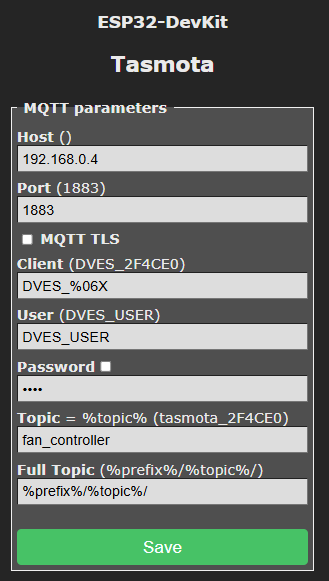
mosquitto_sub -h localhost -t "#" -vtele/fan_controller/LWT Online tasmota/discovery/7C87CE2F4CE0/config {"ip":"192.168.0.46","dn":"Tasmota","fn":["Tasmota",null,null,null,null,null,null,null],"hn":"fan-controller-3296","mac":"7C87CE2F4CE0","md":"ESP32-DevKit","ty":0,"if":0,"cam":0,"ofln":"Offline","onln":"Online","state":["OFF","ON","TOGGLE","HOLD"],"sw":"15.2.0","t":"fan_controller","ft":"%prefix%/%topic%/","tp":["cmnd","stat","tele"],"rl":[1,0,0,0,0,0,0,0,0,0,0,0,0,0,0,0,0,0,0,0,0,0,0,0,0,0,0,0,0,0,0,0],"swc":[-1,-1,-1,-1,-1,-1,-1,-1,-1,-1,-1,-1,-1,-1,-1,-1,-1,-1,-1,-1,-1,-1,-1,-1,-1,-1,-1,-1,-1,-1,-1,-1],"swn":[null,null,null,null,null,null,null,null,null,null,null,null,null,null,null,null,null,null,null,null,null,null,null,null,null,null,null,null,null,null,null,null],"btn":[0,0,0,0,0,0,0,0,0,0,0,0,0,0,0,0,0,0,0,0,0,0,0,0,0,0,0,0,0,0,0,0],"so":{"4":0,"11":0,"13":0,"17":0,"20":0,"30":0,"68":0,"73":0,"82":0,"114":0,"117":0},"lk":0,"lt_st":0,"bat":0,"dslp":0,"sho":[],"sht":[],"ver":1} tasmota/discovery/7C87CE2F4CE0/sensors {"sn":{"Time":"2026-02-14T17:25:50","AM2301":{"Temperature":14.2,"Humidity":56.7,"DewPoint":5.7},"TempUnit":"C"},"ver":1} reactor/mqtt/LWT onlineIn my Reactor.yaml file I added this:
- id: mqtt
  name: MQTT
  enabled: true
  implementation: MQTTController
  config:
    source: "mqtt://127.0.0.1:1883"
    tasmota_discovery: true
192.168.0.4 is the MSR / MQTT Broker Debian box.
Probably a bad idea but I then asked A.I. what the problem might be and it was telling me I needed to change my reactor.yaml file and change
implementation: MQTTControllertoclass: MQTTControllerand it also told me to add these two lines at the top of the reactor.yaml filesystem: extension_path: /home/stuart/reactor/extI don't know if it made that up or read it somewhere, I could not see any reference to it. Anyway MSR didn't want to load the MQTT Controller into Entities when I changed it to "class" instead of "implementation".
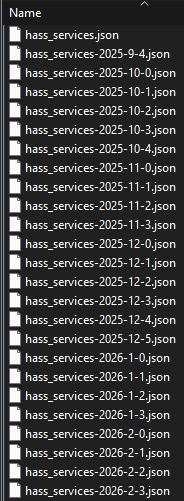
In my file system it looks like this:
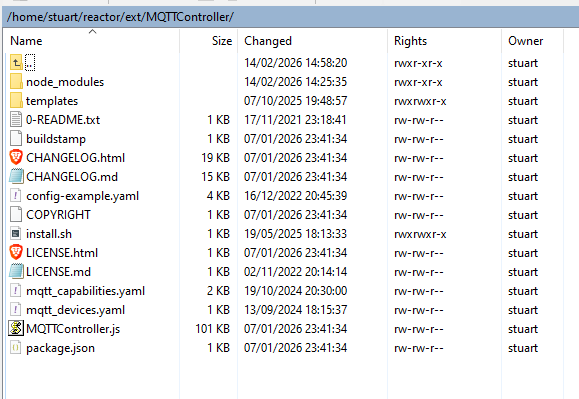
I am not sure what I am missing?
Thanks.
EDIT: The A.I. also told me to run a command to change the IP from 127.0.0.1 to 0.0.0.0 perhaps that was a mistake.
Here is what IP and port it seems to be listening on:
 sudo ss -tlnp | grep mosquitto
LISTEN 0      100          0.0.0.0:1883      0.0.0.0:*    users:(("mosquitto",pid=23713,fd=5))
Here is what the A.I. said when I asked it why we changed it from 127.0.0.1 to 0.0.0.0
"1. The Broker (Mosquitto) at 0.0.0.0
Think of 0.0.0.0 as "Listen to everyone."Because Mosquitto is set to 0.0.0.0, it is listening for messages from both the internal system (the HP Thin Client itself) and external devices (your ESP32 fan controller).
If it were set to 127.0.0.1, it would be "deaf" to your ESP32.
- Reactor at 127.0.0.1
Think of 127.0.0.1 as "Talking to myself."
Since Multi-System Reactor and Mosquitto are both living on the same HP Thin Client, Reactor doesn't need to go out onto the Wi-Fi to find the broker. It just looks internally.
Using 127.0.0.1 (localhost) is faster and more secure because that traffic never even leaves the computer's CPU.
So, no, it is not a problem! Reactor talks to the broker internally (127.0.0.1), and the ESP32 talks to the broker externally (192.168.0.4). They meet in the middle inside the Mosquitto database.""
- Reactor at 127.0.0.1
-
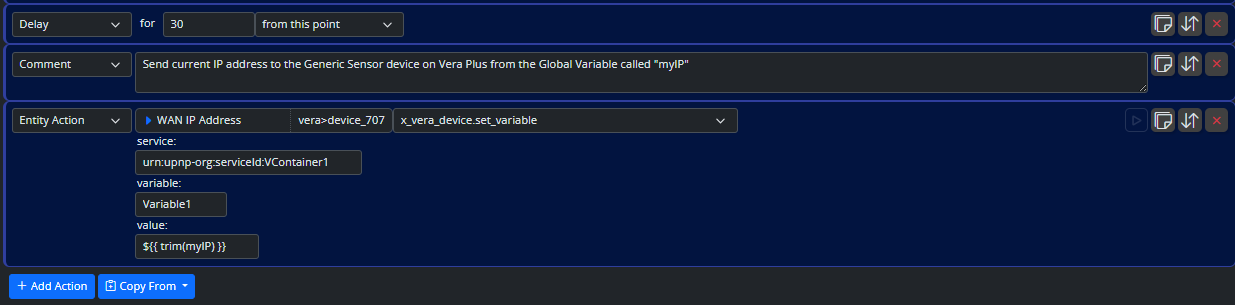
Existing Rule stopped working HTTP command fetching IP address from website@toggledbits said in Existing Rule stopped working HTTP command fetching IP address from website:
${{ trim(myIP) }}
OK done that. I am still getting an error with that new HTTP end point:
Reaction "GET My WAN IP Address<SET>" (rule-kmomxige:S) step 2 HTTP request failed
FetchError: request to https://icanhazip.com/ failed, reason:
Last 2:05:16 PMMy rule now looks like this:

-
Existing Rule stopped working HTTP command fetching IP address from websiteIt seems to be working only issue is in the Global Expression "myIP" its adding a "\n" to the end of the WAN IP address for some reason. Like: Current value: (string) "10.20.30.40\n".
-
Existing Rule stopped working HTTP command fetching IP address from website@toggledbits > https://icanhazip.com
Thanks for the tip, I have changed the rule to use your suggested HTTP end point instead. Will see how I get on with that.
-
Existing Rule stopped working HTTP command fetching IP address from websiteMaybe there is something wrong with the HTTP end point, I am seeing these errors now in the MSR status area.
Reaction "GET My WAN IP Address<SET>" (rule-kmomxige:S) step 2 HTTP request failed
FetchError: network timeout at: https://ipv4.jsonip.com/
Last 10:30:28 AM -
Existing Rule stopped working HTTP command fetching IP address from websiteOK that's strange I just restarted MSR and the rule has started working again now. Its populated both the temp local expression and the "myIP" Global Expression and sent the correct current WAN IP address to Vera and the MultiString device. Maybe unchecking Suppress alerts on HTTP errors unblocked it. Dunno but its working now it seems.