I've switched to a virtual entity with both power_switch and string_sensor capabilities to represent the current holiday.
The power switch is used to indicate if it's a public holiday (so, no school/work), while the string sensor is a string with the actual holiday (Easter, Christmas, Halloween, etc - we don't have thanksgiving), mostly to drive lights.
I build it with some static dates (mostly birthdays/anniversaries) and then the dynamics ones are taken from webcal.guru. My lights/scenes are linked to events this way and it's easier to manage it in the long run: just a bunch of group action in the reaction driving the lights. This part is outside Reactor for me (because, legacy), but it's not difficult to completly drive it off a virtual sensor or a custom controller.
I don't know how people are doing this, but I'm lefting a note for the ones looking for a working solution.
So, it was time for me to move from Vera to something modern. It served me well, but I have new devices I want to add and old that I want to fully use. I have 3 weeks off in August, so plenty of times to tweak things.
Long story short, I moved and turned off my two Veras (one prod, one dev).
Hardware:
Zwave.me controller, updated to FW 5.39, SDK 6.28.1 (it is necessary, since my Veras have the latest FW available). I opted for a 500 controller because of all the drama with 700/800 and the need to stay on something stable.I have 60 Zwave devices, so starting from scratch was a big no for me.
I started from this famous guide, after taking a backup from the Vera Prod to the Vera Dev:
Zway plugin for openLuup . Contribute to rafale77/Z-Way development by creating an account on GitHub.
But it was not working. So, the route I went is:
Go the Vera UI and go under Settings/Z-wave settings, take a screenshot (HouseId in particular). take a backup from the prod system extract the file /etc/cmh/user_data.json.lzo from the backup move the file to the /tmp directory of your dev system execute pluto-lzo d /tmp/user_data.json.lzo /tmp/user_data.json open and edit the file, looking for a port node with something like /dev.. and put /dev/ttyACM0 inside. save the file. run pluto-lzo c /tmp/user_data.json /tmp/user_data.json.lzo copy the .lzo file to the backup, in the same position insert the Zwave key into the USB of your dev Vera reboot the dev Vera wait a lot for it to finish ⚠️ it will probably say that it cannot start ZWave, don't worry Go the Vera UI and go under Settings/Z-wave settings, you should see the old HouseId. Anyway, double check with the screenshot you took previously: if it matches, you've moved your Zwave Network to the new controller! 🎉Shutdown the Veras, take the USB Key with your ZWave network and move it to ZwaveJS!
I've installed it via Docker, very easy. Go for ZwaveJS UI, so you got the UI as well.
Interview the nodes, have patience. Some battery nodes will need wake-ups, others will complete automatically. I had to re-pair a couple of devices because of incorrect pairing with Vera (security and non-security mixed together). In this case, pro tip: reset the device, and then use the replace function from ZWave JS, to have the same node id.
Now, if you're already running under Reactor, you'll need to rewrite all your logic. I asked ChatGPT to write me a Powershell script to get the device from the Veras and build the new naming convention. The logic is that AltId in Vera is in fact the ZWave Node ID, and on Reactor you'll get device like zwavejs>nodeid-endpoint (ie: 95-0, 95-1, etc). So, I built a script that replaced all the occurrences from the storage of Reactor (did I mentioned to do a lot of backups?) and set the name via ZwaveJS MQTT apis. Then, I build an Excel file (thanks ChatGPT!) and renamed all the endpoints in Reactor (manually, no APIs to do so). It took me about an hour.
Now, no more trip/untrip lost along the radios, and a blazing fast ZWave network to enjoy.
Since a couple of devices are recognized in a different way, I had to re-write a couple of rules (and wait a couple of fix here and there by @toggledbits for devices not properly recognized, thanks!), but I was OK in a couple of days, and ready to run by the first afternoon, so I maintained an high WAF.
Now, I could experiment the joy of SmartStart and proprietary commands. 🎉
Thanks to the people that moved before me, inspired me and to @toggledbits for the incredible platform that has built in the latest years! Feel free to ask question if you need help.
If you’re like me and still running HABridge to control your devices locally via Alexa, you might need to tweak your endpoints to call Reactor via HTTP. Here’s the best way to do it, IMO:
Insert the Reactor Canonical ID (e.g., zwavejs>71-1) into the MapID field, but make sure it’s URL-encoded like this: zwavejs%3E71-1.
Then, configure these endpoints as needed:
On: http://[ReactorIP]:8111/api/v1/entity/${device.mapId}/perform/power_switch.on Off: http://[ReactorIP]:8111/api/v1/entity/${device.mapId}/perform/power_switch.off Dim: For lights: http://[ReactorIP]:8111/api/v1/entity/${device.mapId}/perform/dimming.set?level=${intensity.decimal_percent} For roller shutters: http://[ReactorIP]:8111/api/v1/entity/${device.mapId}/perform/position.set?value=${intensity.decimal_percent} Color: http://[ReactorIP]:8111/api/v1/entity/${device.mapId}/perform/rgb_color.set_rgb?r=${color.r}&g=${color.g}&b=${color.b}Just replace [ReactorIP] with your actual IP address. By using these placeholders, you can standardize your endpoints across all devices, making maintenance easier.
This setup works with any device mapped under MSR, regardless of the controller (ZWaveJS, Vera, HASS, OpenSprinkler, virtual, MQTT, DynamicEntities, etc.). If you need different calls, just go to the entities, get the action and parameters, and adjust accordingly. Enjoy super fast access to your devices via Alexa!
If you're migrating from Vera, the endpoints are (URL-encoded) in a file called device.db, in JSON format, under your config. You'd write a script to align the new endpoints to the new one, if you prefer to do it automatically. YMMV.
I’m moving a lot of my home automation Raspberry Pi’s to Proxmox virtualisation and really enjoying it.
I would like to install Reactor that way too. Having researched this forum I’m surprised more people haven’t ventured into this. Although I use HomeAssistant in Proxmox I don’t want to use the HAOS path addin one user has tried as it seems to be unsupported now.
What would be the best way to install Reactor under Proxmox? As a Linux VM (flavour?) with manual install or as a Docker install or even following the Portainer write up with Docker install underneath? Proxmox tend to recommend you away from Docker where possible.
Keeping Reactor upto date easily would be a big consideration too.
Thanks for any recommendations and anyone running Reactor within Proxmox already ?
There’s a growing number of helper scripts for Proxmox that one click install home automation favourites as a prebuilt Linux container (LXC) . It would be nice to get Reactor listed and installed this way too…under the automation category
Hi guys,
I have started searching for some information about the microcontrollers/controllers with which I can develop my own controller and the SMART-house. It is needed for my research work. I am new to this, and it is hard for me to find the necessary information.
I have found that such controllers as Arduino, Raspberry PI, ESP32, etc can be used.
However, how can I find the model of the controller which can suit my requirements? They are the following:
2-stage building with a garage (so it is +-400 sq.m.) with some number of SMART devices that are responsible for security (cameras, fire alarm, etc), temperature control, radiators, leakage control, opening/closing control, etc.
I am interested in the hardware area at first.
Any advices, links to the resources, researches, and articles with a similar topic will be really appreciated.
PS: sorry for my not clear English (just in case)
Thank you in advance.
I know this Forum has never focused much on SmartThings or Hubitat, thus not surprisingly I find virtually nothing here concerning the Groovy programming language or creating drivers/apps for those platforms.
I'm curious: Is there any interest at all for co-authoring a "Definitive Guide to Coding Drivers & Apps for Hubitat" among our motley crew?
Hello guys. I'm currently building my own home and i want it to be kind of high tech and cool but i have actually never owned a smart device other than a smartphone and an old smart TV so i don't even know what exactly am i looking for. I will explain my idea and i am looking forward to somebody shining some light.
Sooo - i was thinking about getting a WiFi controlled AC, TV, Washing machine, Dryer and smart switches for the lights. I suppose i need some kind of a assistant that connects to the wifi and can control all of these. Also i want an audio system - for the TV in the living room aaaand i also want to have 2 speakers in the bathroom which i have no idea where i would connect. I guees i need some kind of a receiver and amplifier for them to work correctly. But i also want that reciever to be hidden somewhere so it ahould be small and it also should be able to connect to the wifi i guess.
So wgat exactly do i need so far. Would any wifi device connect to any assistant? Or am i lookng for particullar stuff... Will i be able for example to turn on my AC from outside the household for example when im at work? And can i also connect an alarm system of some type?
Hello everyone, I am new here and also the conversion to smart home is new territory for me.
I have a problem with an LED panel. This is coupled with a motion detector in my hallway.
As soon as you enter the room it lights up, so far so good. However, it always lights up in a bright purple, even though my setting calls for gold.
Now I select the lamp via the Hue app and drag my finger across the color palette, the panel changes to those colors and I have to keep selecting the preset hue.
Can someone explain to me how I can keep this setting permanently without having to tediously reset?
With kind regards
Loorrd
Having spent years as a professional portrait photographer, I came by many tricks of the trade involving readily available materials. One such trick is known as an "Oil Spot Photometer", which can help you equalize the brightness of two or more light sources.
For simple setup instructions, visit:
https://www.exploratorium.edu/snacks/oil-spot-photometer
The implications for Home Automation, of course, is knowing the preset dim levels needed to balance a room's lighting, without guessing. Just bear in mind that dimmer levels and bulb output are rarely linear, so you may have to take photometer readings at various brightness levels to create a lookup table (for use in MSR, etc.).
I have been wondering what to post here so bear with me as I am just having a bit of fun given the fact that I haven't had much to fix, improve on or optimize for my home automation setup, I just added a scene today to make a TTS announcement to remind me to plug in my car when its level is low. Not really a necessity but since I have not been commuting anymore for a few months, I caught myself a few times wishing I had recharged my car the day before.
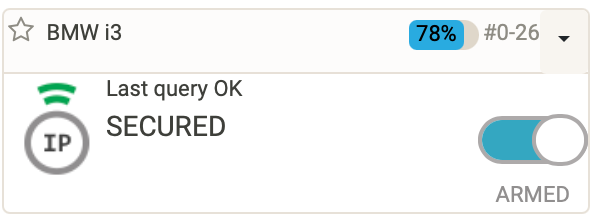
This is what it looks like on openLuup:
Screen Shot 2021-03-08 at 3.08.01 PM.png
I reused a SiteSensor device which was polling my HomeAssistant integration for its lock status (Yes I can get openLuup to lock and unlock my car remotely) and made Home Assistant send the battery status.
To do this, I added a rest service command on home assistant:
rest_command: bmw_bat: url: "http://openLuupIP:3480/data_request?id=variableset&DeviceNum=26&serviceId=urn:micasaverde-com:serviceId:HaDevice1&Variable=BatteryLevel&Value={{states('sensor.i3_charging_level_hv')}}"Note the device number which will need to be the device you want to send the battery status to and the home assistant entity which you will have to replace with the one you want. Then I created an automation on home assistant to trigger this service whenever the entity state changes.
Screen Shot 2021-03-08 at 3.20.36 PM.png
Screen Shot 2021-03-08 at 3.20.46 PM.png
After that I just simply created a scene on openLuup to watch the battery level variable and do whatever I need to do with it.
This is an example of syncing entities in home-assistant to openLuup. I have a number of other similar integrations...
Wanting to install in Proxmox.. what’s the best way?
-
I’m moving a lot of my home automation Raspberry Pi’s to Proxmox virtualisation and really enjoying it.
I would like to install Reactor that way too. Having researched this forum I’m surprised more people haven’t ventured into this. Although I use HomeAssistant in Proxmox I don’t want to use the HAOS path addin one user has tried as it seems to be unsupported now.
What would be the best way to install Reactor under Proxmox? As a Linux VM (flavour?) with manual install or as a Docker install or even following the Portainer write up with Docker install underneath? Proxmox tend to recommend you away from Docker where possible.
Keeping Reactor upto date easily would be a big consideration too.
Thanks for any recommendations and anyone running Reactor within Proxmox already ?
There’s a growing number of helper scripts for Proxmox that one click install home automation favourites as a prebuilt Linux container (LXC) . It would be nice to get Reactor listed and installed this way too…under the automation category
-
My recommendation is to use a light OS you are comfortable with, add docker and docker-compose, and run Reactor that way. My go-to for amd64 architecture is a Lite (no desktop/GUI) install of the latest LTS version of Ubuntu and keep it up to date.
-
Actually that’s just what I’ve done.
I did try the Portainer route as there are Proxmox scripts to rapidly create a Docker/Portainer LXC but the Portainer version / UI was very different to the write up here so I installed Reactor & MQTT direct to Docker with Docker Container and it seems to all be working fine Portainer I have later installed too and it sees the Reactor container obviously. I’ve had a slight problem with root vs normal user but I think I’ve managed to get everything installed away out of root.
I like the up to date nature of Docker Compose and I believe MQTT is preserved. So I avoided a direct install to a Linux distribution as I think that would be more work to keep current going forward.
One more part of my HA setup off of a Pi as I move to have a predominantly MQTT centric system.