
Setting up RFXCom Plugin in standalone OpenLuup
-
Currently there's no beginners guide to installing RFX plugin on OpenLuup without Vera that i could find, so i'd thought i'd make one.
This is made on Debian 10.6 (Buster).
First: Download the files. The thread on the Vera forum is the place to find the newest version (Currently 1.96), but i found it to have several issues in Openluup.
Auto create makes multiple instances of sensors, and I had a couple of "all sensors disappeared" instances!I use 1.41, which works perfectly as long as you can use Type1/Type2/ext/ext2 FW.
Download from this threadOnce you got the files into
/cmh-ludl/you can proceed to create the device in OpenLuup. In devices - click "Create".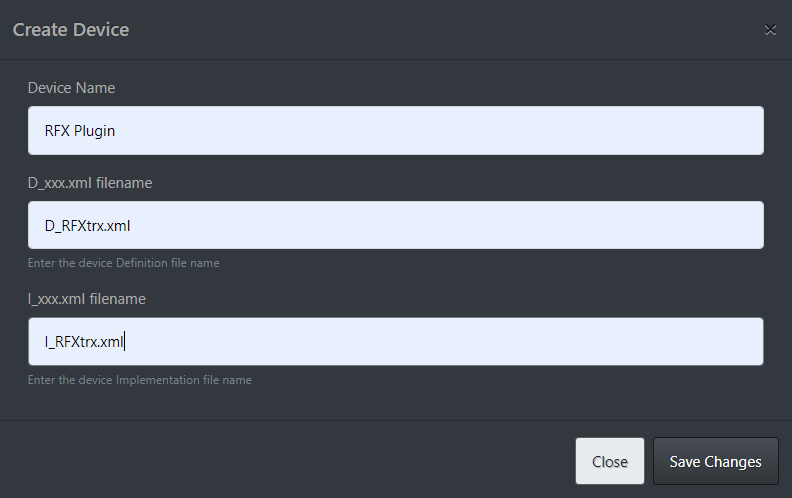
Sometimes its nessecary to move the RFX..Png file to
/cmh-ludl/icons/to get the correct icon in OpenLuup.Next is to get the RFX up and running, for that you need ser2net. Installation instructions
Ser2net needs to find the USB, and to fint the address, do this:
user@device:~$ cd /dev/serial/by-id/
user@device:/dev/serial/by-id$ ls
usb-0658_0200-if00  usb-RFXCOM_RFXtrx433_A118TU8K-if00-port0
user@device:/dev/serial/by-id$
this ID can be used in the
/etc/ser2net.conf, at the end of the file:# found in /usr/share/doc/ser2net/examples BANNER:banner:\r\nser2net port \p device \d [\s] (Debian GNU/Linux)\r\n\r\n 2000:telnet:600:/dev/ttyS0:9600 8DATABITS NONE 1STOPBIT banner ... 3001:telnet:600:/dev/ttyS1:19200 8DATABITS NONE 1STOPBIT banner 3485:raw:0:/dev/serial/by-id/usb-RFXCOM_RFXtrx433_A118TU8K-if00-port0:38400 8DATABITS NONE 1STOPBITThe port can be whatever you want (almost), the default in the RFX plugin is 10000
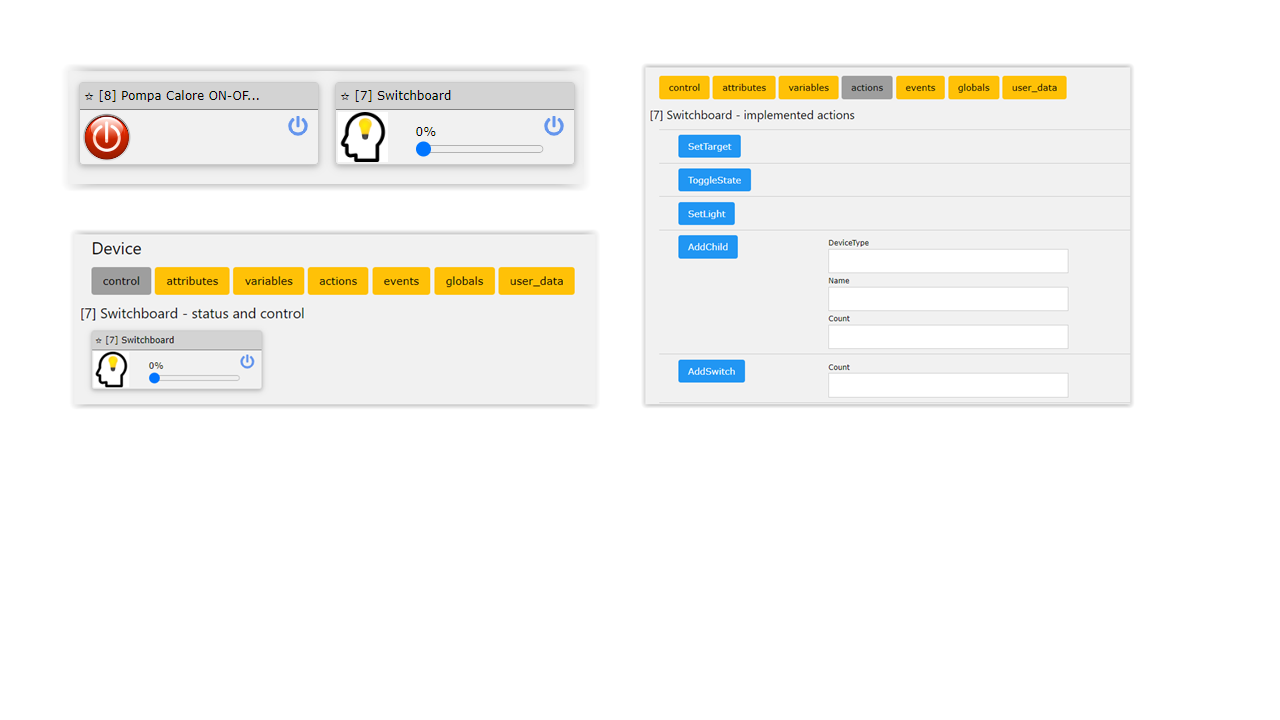
Save and restart ser2net.Back in OpenLuup, go to the "Attributes" tab of the RFX Plugin,and ensure that the IP address is correct:
 I'm using a local USB, but this might as well be on a different device on your network.
Now, go to the "Variables", and insert the correct port number in "IPPort" variable.
If all goes well, the plugin should be good to go after a Luup Reload!